
Welcome, fellow tech enthusiast! If you’re anything like me, you’ve probably dreamed of having your own little corner of the digital universe—a place where wires hum, servers whir, and blinking LEDs create a symphony of possibilities. Well, my friend, you’re about to embark on an exciting adventure as we dive headfirst into the world of homelabs.
Why a Homelab
Before we delve into the nitty-gritty details of hardware, software, and network configurations, let’s take a moment to ponder why homelabs matter. Imagine having a playground where you can experiment, learn, and tinker without any constraints. Whether you’re a seasoned sysadmin, a budding developer, or just someone who loves gadgets, a homelab provides the canvas for your digital masterpiece.
The hardware chronicles
Our journey begins with the tangible, the hardware that forms your homelab. Picture this: a sleek gateway guarding the entrance, a managed switch orchestrating data flows, access points spreading Wi-Fi magic, a sturdy rack shelf cradling your servers, and a trusty UPS ensuring uptime even during power outages. Oh, and let’s not forget the Zigbee—because who doesn’t love a touch of automation?
Vision and initial requirements
When I started building my first homelab, I needed some vision and initial requirements to avoid costly mistakes. I meticulously researched on Reddit hardware options, software configurations, scalability considerations, and power efficiency factors. As I laid the foundation for my homelab, I envisioned a versatile environment that would serve both my personal projects and professional development. This foresight allowed me to make informed decisions, optimize my setup, and create a robust infrastructure that continues to evolve.
Network
- Centrally managed network devices to avoid manual and repetitive tasks.
- Dedicated network devices, networks must operate if the server is down.
- Category 6 Ethernet cables, to enable future upgrades up to 10GBASE-T.
- Gigabit Ethernet network devices to strike a balance between performance and affordability.
- Wi-Fi 802.11ax to take advantage of the Gigabit network.
- Mesh Wi-Fi technology to extend coverage by creating a seamless network across my home and surroundings.
- Power over Ethernet to simplify the deployment of Wi-Fi access points, IP cameras, and other network devices.
Server
- Power efficient to keep electricity costs under control.
- Multi-core CPU with high clock speeds and enough memory to handle all my virtual machines.
- GPU for hardware accelerated vision inference.
- NVMe SSD disk for OS to get lightning-fast read and write speeds.
- Enterprise grade SATA disk for virtual machines to achieve reliability, durability, consistent performance, and avoid quick disk wear.
- USB 3.0 ports to connect external HDD storage for camera recordings and backups.
Cameras
- IP cameras with RTSP for wide compatibility with various recording and monitoring systems.
- Can operate without internet access. The last thing I would want is for the cameras to have access to the internet.
- Decent image quality. Fixed focus length, 8Mpx/4Mpx with at least 1/3’’ CMOS image sensor.
- IR illumination to get night vision.
- H.265 codec to get better video quality at given bit rate compared to older codes like H.264.
- Avoid vendor specific “smart” features. Rely on open-source software for recording and detection, and avoid paying extra for features like facial recognition or cloud-based analytics.
IoT
- Don’t over-engineer, smart homes should enhance the user experience, not complicate it. Essential functionalities must operate if the home automation is down.
- Base on Zigbee mesh network, to avoid vendor specific Wi-Fi solutions.
- Wi-Fi devices only if there are no Zigbee viable options. They have to work in a local network without cloud access and integrate well with Home Assistant.
Other parts
- 19’’ rack for mounting your network equipment, servers, and other devices.
- Patch panel for neatly organized Ethernet cables.
- Small UPS to ensure uninterrupted power supply during short electricity outages or fluctuations. Compatible with open-source software for monitoring and control.
Big picture
I initiated the setup of my Homelab by meticulously planning the computer network in the house, but the end result resembled a tangle of cables emerging from the walls in the utility room.
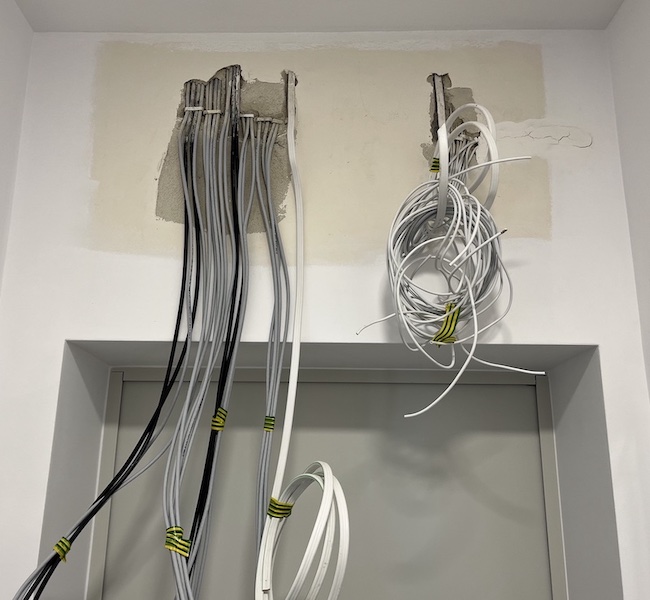
It took considerable effort and time to build everything from scratch. Now, below, you can observe the current state of the network equipment, servers, and other devices—neatly mounted and strategically positioned just above the door leading to the garage.
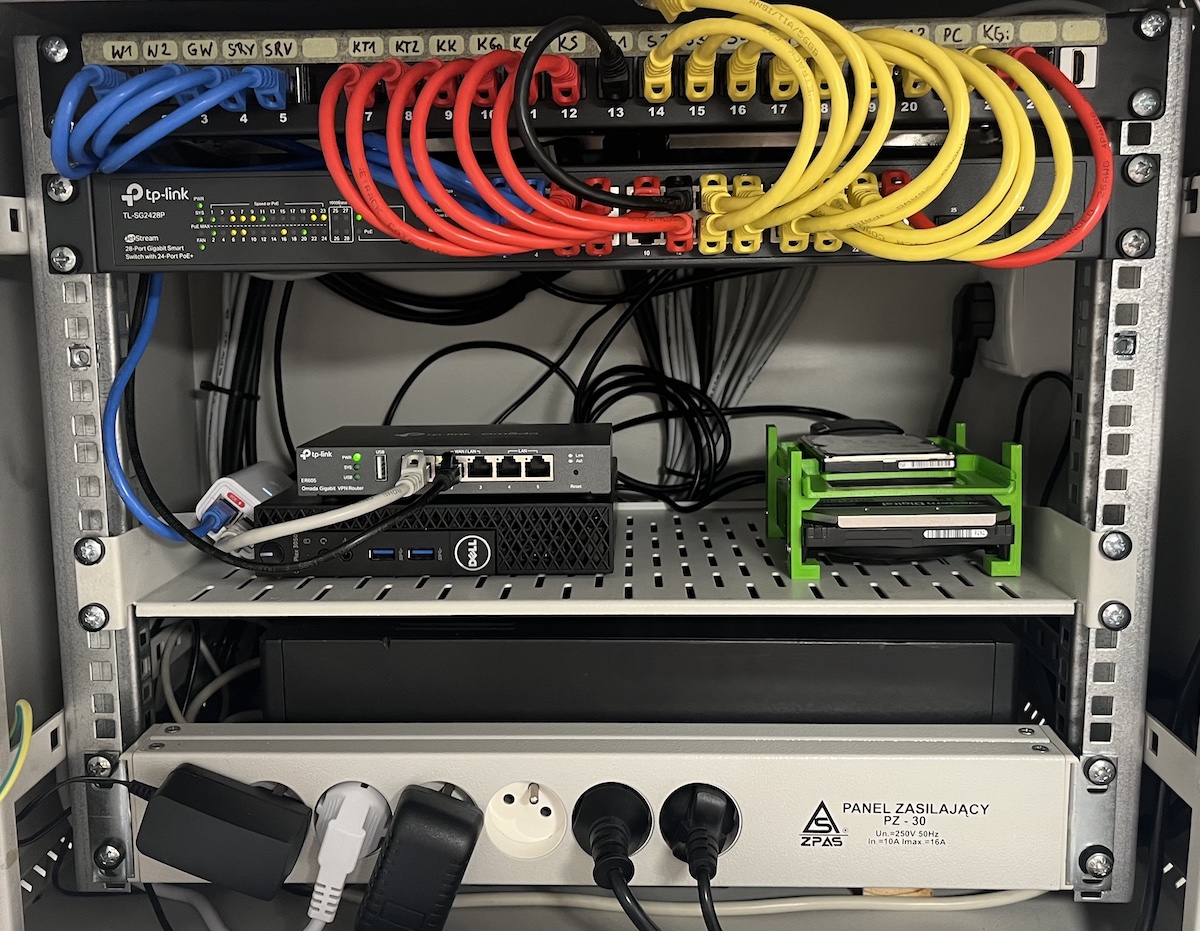
Given that all the cables are well organized, understanding the entire topology can still be challenging. Below, you’ll find the physical Homelab connection diagram, devices mounted in the rack cabinet are marked orange:
flowchart LR
    modem[Radio Modem] == eth PoE === poe[PoE injector]:::rack
    poe -- eth --- router[Router]:::rack
    router -- eth --- switch[Managed Switch]:::rack

    switch -- eth --- server[Server]:::rack
    switch == eth PoE === aps[Access Points]
    switch == eth PoE === cameras[Cameras]
    switch -- eth --- iot_lan[IoT Devices]
    switch -- eth --- tv[TV Box]
    switch -- eth --- computers_eth[Computers]

    server -- usb --- zigbee[Zigbee Gate]
    server -- usb --- hdds[External HDDs]:::rack
    server -- usb --- ups[UPS]:::rack

    aps -. wifi .- phones[Phones]
    aps -. wifi .- computers_wifi[Computers]
    aps -. wifi .- iot_wifi[IoT Devices]

    zigbee -. zigbee .- iot_zigbee[IoT Devices]

    classDef rack fill:Orange
Radio modem
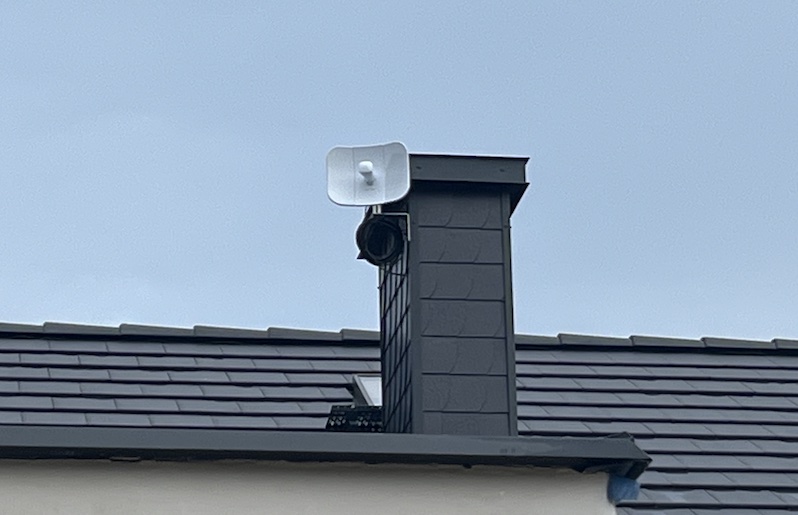
Given the absence of optical fiber at my homelab installation site, I rely on radio access for internet connectivity. My service provider has installed the Ubiquiti airMAX LiteBeam 5AC, an ultra-lightweight outdoor wireless station specifically designed for point-to-point communication. The base station is situated a little over 2 kilometers away, and the reported latency on my WAN link is approximately 22 milliseconds.
TP-Link Omada network devices
I made the deliberate choice to deploy TP-Link network devices from their business line, expertly managed by the Omada Software Controller. Notably more budget-friendly than the options offered by Ubiquiti Unifi, these TP-Link devices seamlessly meet all my networking requirements.
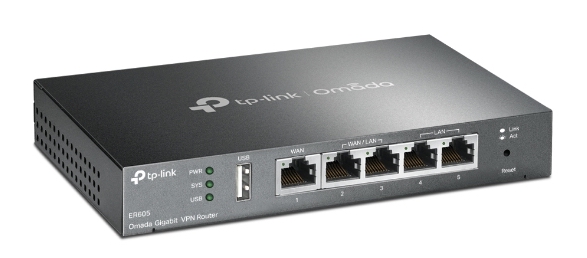
ER605 router
Gigabit router ER605 is a straightforward and functional model that provides essential features without unnecessary frills. Apart from the annoyingly long startup time, the most significant limitation is the lack of support for IP and port based Access Control Lists (ACLs). To work around this, I had to create an additional VLAN.
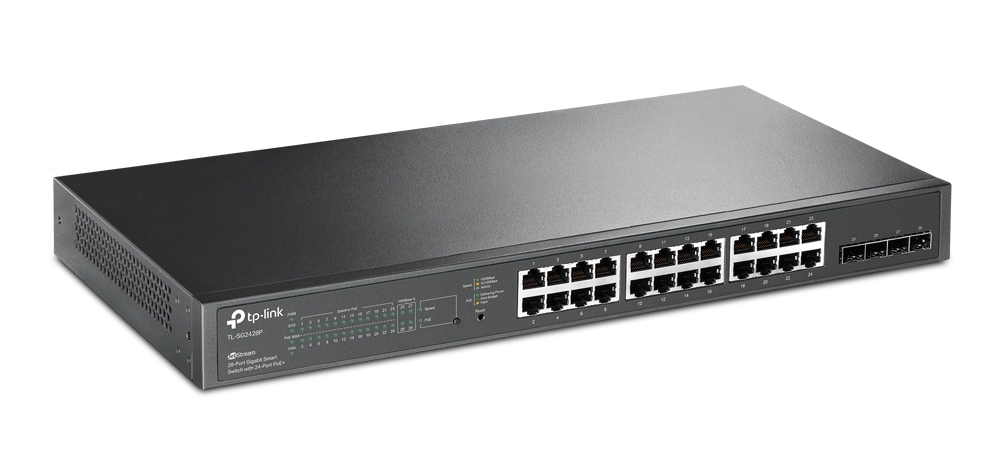
SG2428P managed switch
28-Port Gigabit switch TL-SG2428P is a robust managed switch equipped with PoE and VLAN support. So far I haven’t found any serious shortcomings, but don’t try to run this switch in your bedroom, it’s as loud as a jet. Today I would rather choose new fanless model SG2428LP which has 16 PoE ports out of a total of 28 ports.
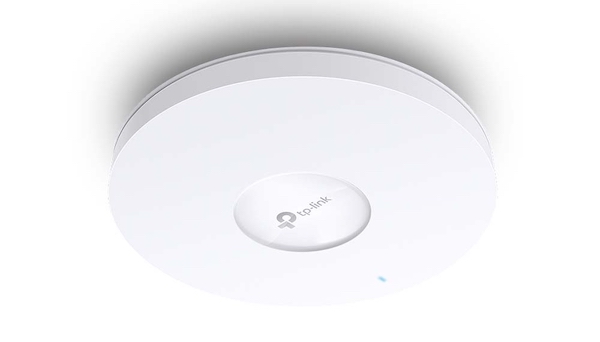
EAP610 access points
WiFi 6 access points EAP610 with simultaneous 574 Mbps on 2.4 GHz and 1201 Mbps on 5 GHz speeds. It provides coverage for most of my house using the 5 GHz network. However, I plan to install an extra access point to improve coverage further.
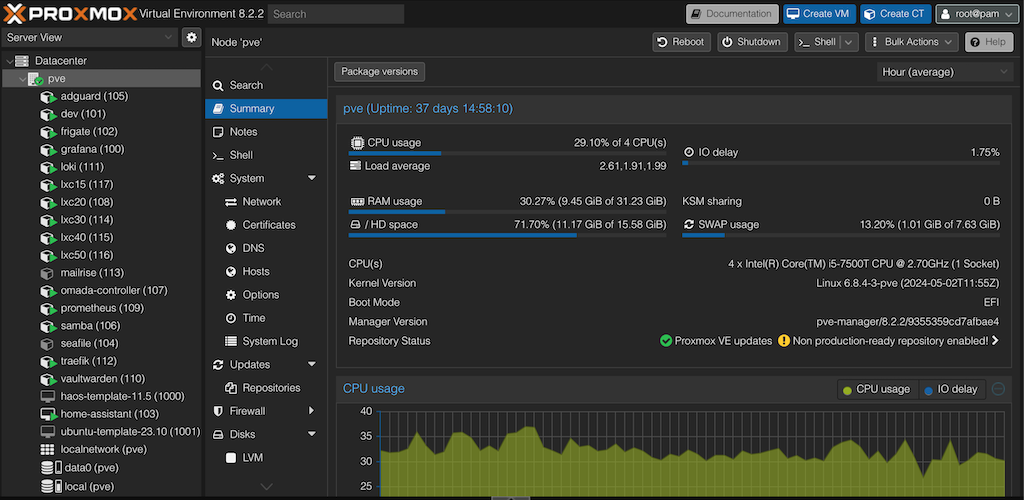
Dell Optiplex 3050 server
A few years ago, I embarked on a project to create a 24/7 home server using a Raspberry Pi 4. While the Pi served its purpose, my evolving Homelab demanded more horsepower without compromising energy efficiency. After careful consideration, I opted for a used Dell Optiplex system equipped with an Intel i5 7th generation CPU. The compact small form factor housing allowed me to maximize space while still achieving the desired performance.
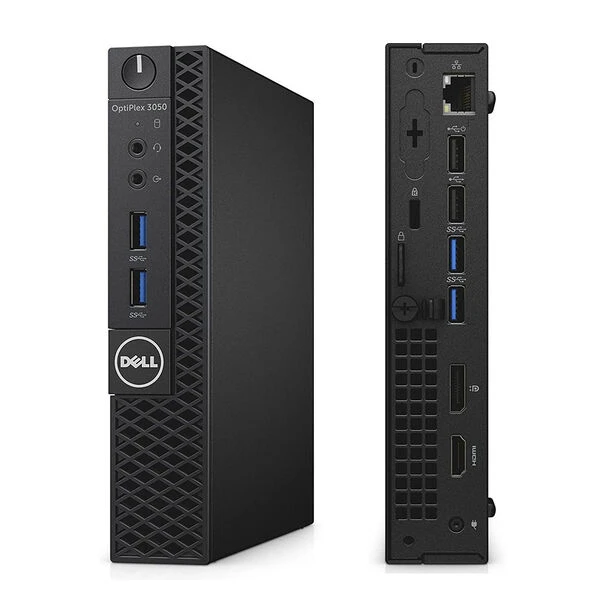
- CPU Intel i5-7500T 2.7GHz, 4 cores
- GPU Intel® HD Graphics 630
- 32GB RAM DDR4 2666MHz
- 256 GB SSD, Samsung PM981 (NVMe, TLC)
- PCI Express 3.0
- Built-in Gigabit Ethernet card
- USB 3.0 × 4, USB 2.0 × 2
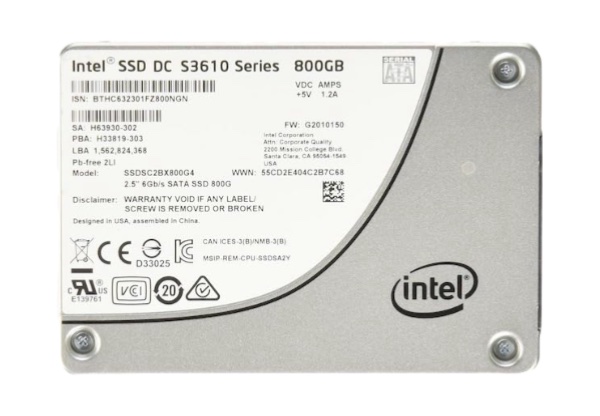
Intel DC S3610 SSD
When it comes to hosting virtual machines (VMs), using enterprise-grade SSDs over consumer grade SSDs offers several advantages: endurance, reliability, consistent performance and power loss protection. I installed a used Intel DC S3610 800 GB (SATA, MLC) SSD with over 50,000 power-on hours, and remarkably, it still reports only 2% wear out.
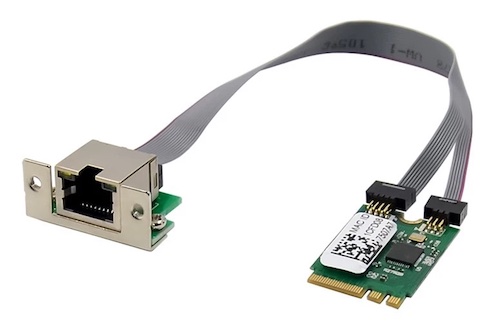
RTL8125B network card
For desktop computers, a single Gigabit Ethernet card suffices. However, when setting up a server, having at least two network devices becomes crucial. Fortunately, since I didn’t require WiFi or Bluetooth functionality, I replaced the stock Intel Dual-Band Wireless-AC 8265 card with a PCIe M.2 A+E 2.5GB RTL8125B network card.
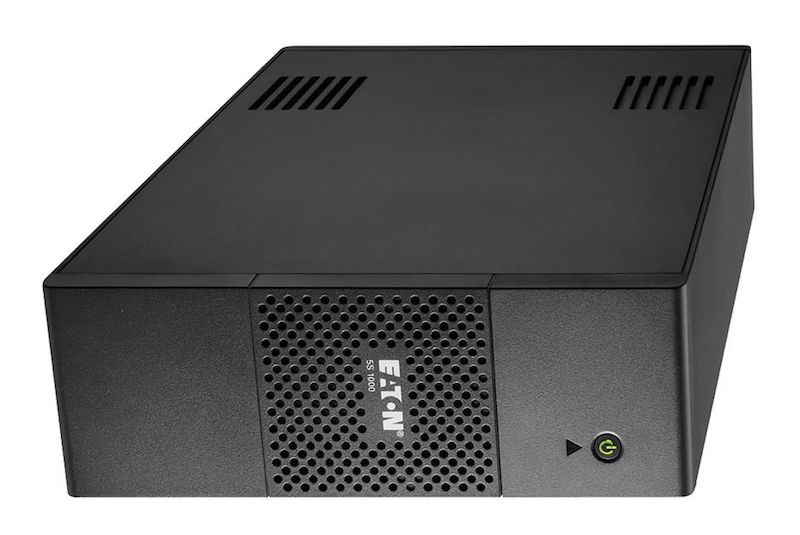
Eaton 5S UPS
Here’s why I chose the Eaton 5S 1000VA UPS for my homelab:
- My homelab has an average power consumption of 75—80 Watts.
- Its line-interactive technology adjusts input voltage fluctuations without switching to battery power unless necessary.
- During outages, it ensures uninterrupted operation for approximately 30 minutes.
- It fits neatly into a 19’’ network rack.
- Network UPS Tools (NUT) on Linux systems simplifies monitoring and management.
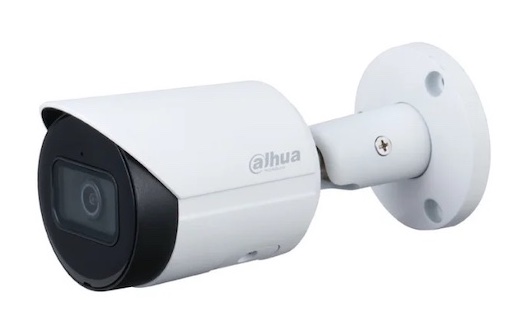
Dahua IP cameras
Given my concerns about the quality of no-name products, I deliberately opted for the reputable brand Dahua. While I also evaluated Hikvision, the affordability factor tipped the scales in favor of Dahua. Specifically, Dahua’s 8 Mpx cameras (IPC-HFW2841S) come in at approximately $100, while their 4 Mpx counterparts (IPC-HFW2441S) are priced around $70.
Storage requirements
To get decent H.265 video quality at 5 FPS I set up: 6Mb/s for 8Mpx cameras and 3Mb/s for 4Mpx cameras. How much storage do I need to store 1 month of recording from two 8 Mpx and six 4 Mpx cameras?
Hourly rate per camera:
1
2
8Mpx: 6 [Mb/s] * 3600 seconds * 1/8 =  2.64 [GiB]
4Mpx: 3 [Mb/s] * 3600 seconds * 1/8 = 1.32 [GiB]
Monthly rate for all cameras:
1
2
2 * 2.64 [GiB] * 24 hours * 30 days = 3802 [GiB]
6 * 1.32 [GiB] * 24 hours * 30 days = 5702 [GiB]
Total required capacity:
1
3802 [GiB] + 5702 [GiB] = 9.5 TiB
WD Purple HDD
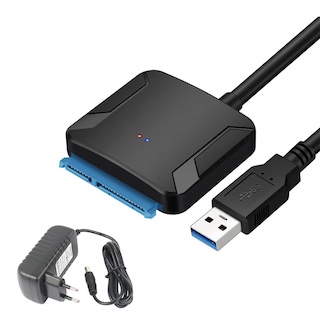
Recordings from my surveillance system are securely stored on a dedicated WD Purple Pro 12TB hard drive. This robust drive supports an impressive workload rate of up to 550TB per year, achieving speeds of up to 245MB/s. During write operations, the average power consumption remains at a modest 6.6 Watts.
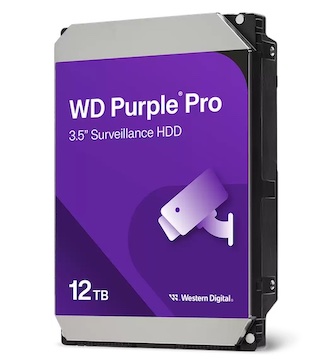
The hard drive is connected to the server using a USB 3.0 to SATA adapter with UASP support. Additionally, for 3.5-inch disks, a 12V/2A power adapter is required.
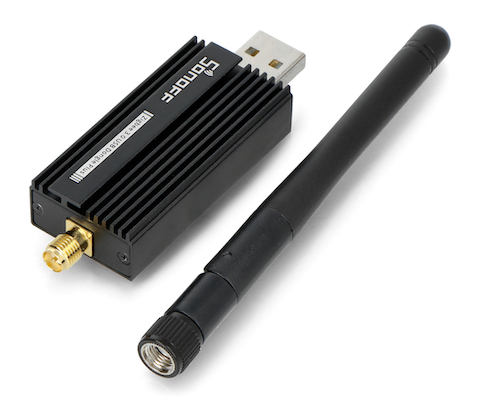
Sonoff ZBDongle-E
Here’s why I chose the Sonoff ZBDongle-E for my homelab:
- Sonoff ZBDongle-E seamlessly integrates with Home Assistant, making it an excellent choice for Zigbee networks within my smart home.
- It’s based on the Silicon Labs EFR32MG21 SoC (System-on-Chip). This powerful chip ensures reliable communication and efficient performance in networks with at least several dozen devices.
- To extend the signal range, I connected the Sonoff ZBDongle-E using a 1.5m USB extension cable and mounted it outside the 19’’ rack. I didn’t observe any connectivity problems, the worst reported Link Quality Indicator (LQI) is 90 for the farthest device.
Final thoughts
I intentionally prioritized lower power consumption over high availability. The setup includes a single server with enterprise-grade SSDs for hosting VMs and external HDDs—one for camera recordings and another for backups. The most important data is replicated in the public cloud, and the infrastructure is defined as code. I can install spare hardware and rebuild the homelab in a few hours, which is an acceptable downtime for me.
Stay tuned
In the next post, we’ll fire up our Proxmox hypervisor, spin up some virtual machines, and explore the software side of things. Spoiler alert: Home Assistant is waiting in the wings!
Comments