I built my homelab at the beginning of 2024, see Building your ultimate Homelab blog post. I hosted many services on it, for example: Home Assistant for home automation, Frigate for surveillance, Vaultwarden for password management, Paperless for document management, Omada Software Controller for network management, Prometheus, Grafana, and many more. I wanted to make my homelab more reliable and more powerful, so I decided to configure Proxmox cluster.
Yet another Dell Optiplex Micro
To build a Proxmox cluster, I needed an additional server. The existing Dell Optiplex Micro 3050 had served me well, so I decided to purchase a more powerful model this time. I opted for the Dell Optiplex Micro 5070, which comes with the following specifications:
- CPU Intel i5-9500T 2.2-3.7GHz, 6 cores
- GPU Intel® HD Graphics 630
- 32GB RAM
- 256 GB SSD, Samsung PM981 (NVMe, TLC)
- Built-in Gigabit Ethernet card
- USB 3.1 Gen 2 × 1 Type-C
- USB 3.1 Gen 1 × 5
Again for hosting VMs and containers, I mounted an enterprise-grade SSD: Intel DC S3610 1.6TB. This SSD is known for its high endurance and reliability, making it an excellent choice for a homelab environment where data integrity and performance are crucial. Despite having 44,123 power-on hours (~5 years), this model boasts an impressive Total Bytes Written (TBW) rating of 10.7PB. The current wear level is at 0%, indicating that the drive has plenty of life left and should continue to perform reliably for a long time. The Intel DC S3610’s high endurance is due to its use of Multi-Level Cell (MLC) NAND technology, which provides a good balance between performance, endurance, and cost.
Make a cluster quorum
I also bought a Dell Wyse 3040 thin client to use as a Proxmox QDevice to achieve cluster quorum. The Dell Wyse 3040 is equipped with a quad-core Intel Atom x5-Z8350 CPU, 2GB of RAM, and 8GB of eMMC storage.
Initially, I considered using a Raspberry Pi for this purpose. However, the Dell Wyse 3040 offered several advantages that made it a better option. Firstly, the built-in eMMC storage of the Wyse 3040 is more reliable and durable compared to the SD cards typically used in Raspberry Pi devices. SD cards are prone to wear and data corruption over time, especially under continuous read/write operations, which can be a significant drawback in a homelab environment where reliability is crucial. Additionally, the Dell Wyse 3040 is more affordable than a Raspberry Pi when considering the total cost, including necessary accessories such as a case, power supply, and storage.
Overall, the Dell Wyse 3040 provides a robust and reliable solution for maintaining cluster quorum in my Proxmox setup, ensuring high availability and seamless failover capabilities.
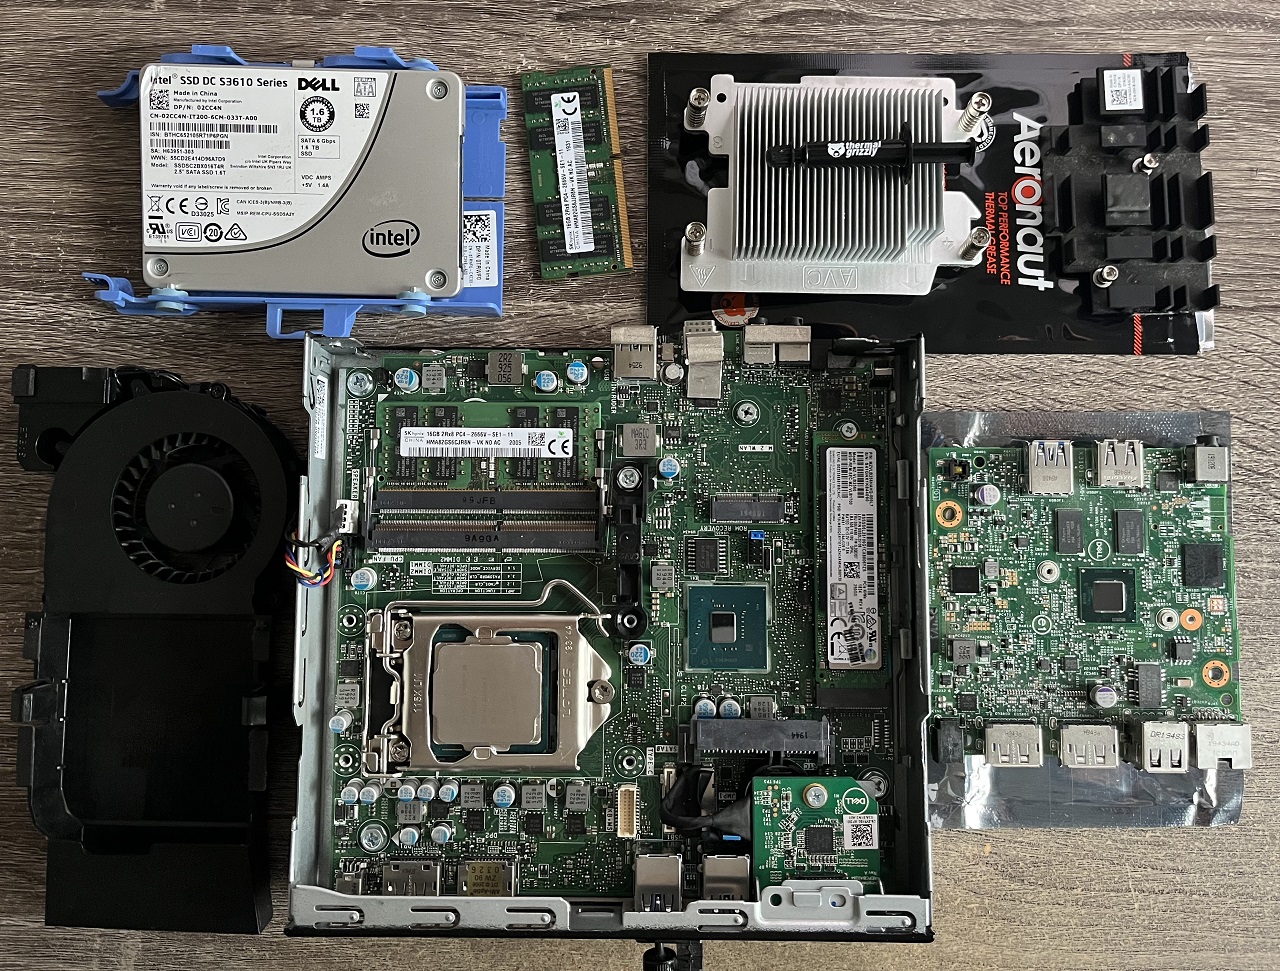
Below you can see the Dell Optiplex Micro 5070 and Dell Wyse 3040 disassembled for thermal paste replacement.
Bigger pipe
A faster network is crucial for ensuring efficient data transfer and reducing latency. It allows for quicker backups, faster VM migrations, and smoother operation of network-intensive applications.
So, I decided to pimp my network by hooking up both servers with some slick 2.5GbE network cards, while keeping my old 1GbE setup intact. I slapped in some RTL8125B network cards using PCIe M.2 A+E adapters, and boom, we’re in business.
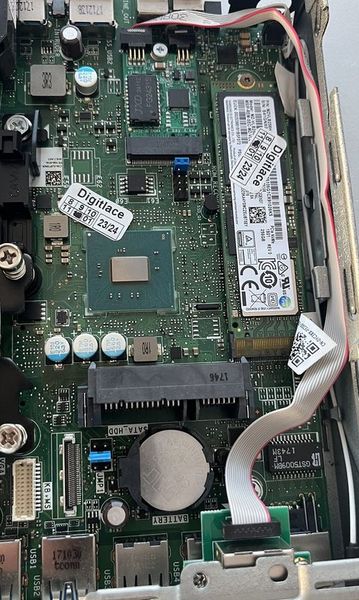
This dedicated network is now the express lane for Proxmox cluster chatter and storage traffic.
1
2
3
4
5
6
7
8
$ iperf -s
------------------------------------------------------------
Server listening on TCP port 5001
TCP window size:  128 KByte (default)
------------------------------------------------------------
[  1] local 10.0.10.30 port 5001 connected with 10.0.10.31 port 41416 (icwnd/mss/irtt=14/1448/99)
[ ID] Interval       Transfer     Bandwidth
[  1] 0.0000-10.0134 sec  2.74 GBytes  2.35 Gbits/sec
Check out the final datacenter installed in my rack:

High availability
I chose not to use shared storage like a Synology NAS because it can become a single point of failure. Instead, replication offers a more resilient solution for my needs. ZFS really rocks! It provides robust data integrity, efficient snapshots, and seamless replication.
With all hardware in place, I started to configure the Proxmox cluster. I created a ZFS pool on both servers and defined a replication schedule to ensure that data is consistently mirrored between the servers. This setup allows for high availability and data redundancy, ensuring that my VMs can be quickly restored or migrated in case of hardware failure.
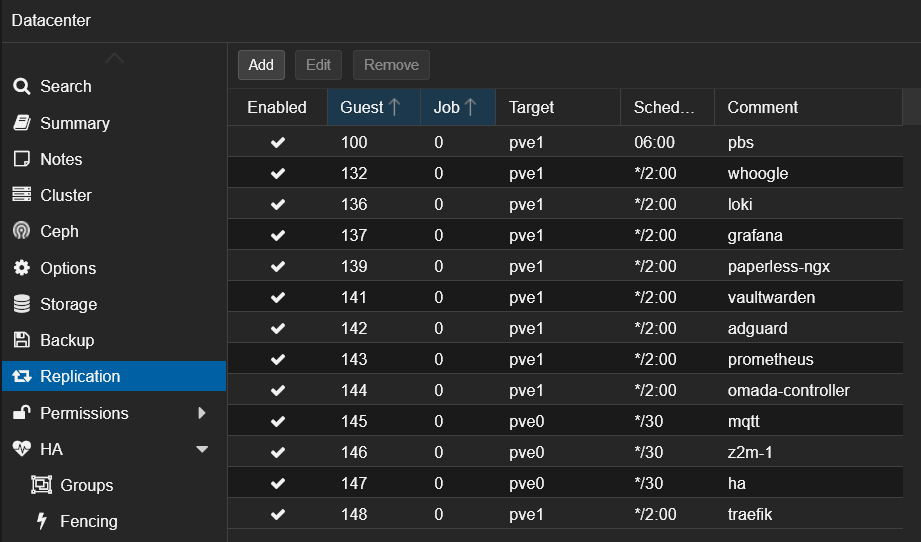
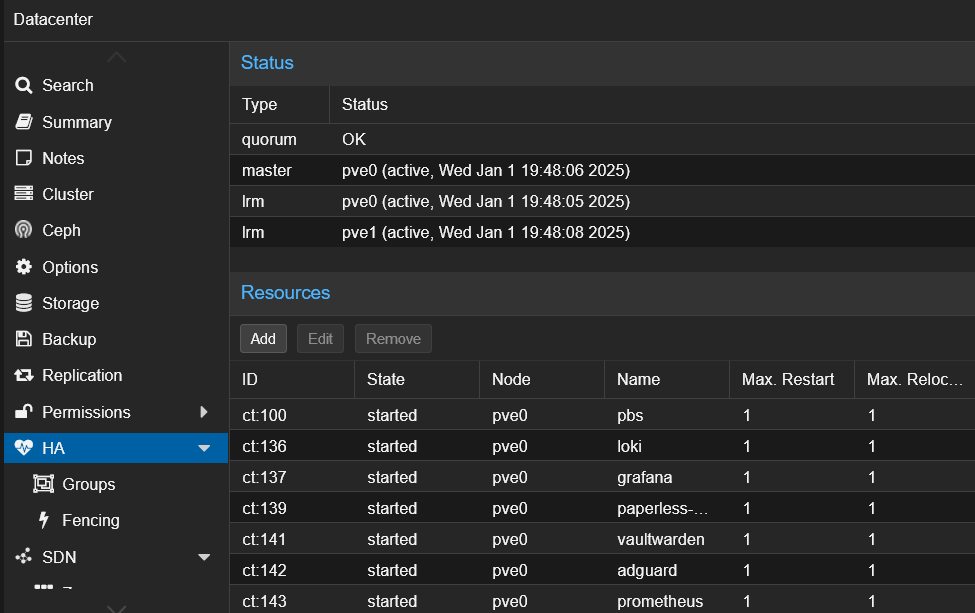
With replicated volumes, I can easily migrate VMs between servers and have a backup in case of hardware failure. Replication uses the 2.5GbE network for better performance. Thanks to the QDevice installed on the Dell Wyse 3040, Proxmox can automatically start VMs on the second server in case of the first server failure. I tested the failover when I pulled old Optiplex Micro 3050 for BIOS update. The VMs were automatically migrated to the second server and started without any issues!
External storage
In my homelab, Frigate stores video recordings on an external USB drive. This drive is connected to one of the servers and shared via NFS to the second server. From the Frigate container’s perspective, the drive is mounted as a local directory, which allows for easy migration of Frigate between servers.
Mounts in /etc/fstab on the server with the external drives:
1
2
UUID=... /mnt/usb1 ext4 defaults,nofail,x-systemd.device-timeout=10s 0 0
UUID=... /mnt/usb2 ext4 defaults,nofail,x-systemd.device-timeout=10s 0 0
Mounts in /etc/fstab on the server with the NFS share:
1
2
10.0.10.31:/mnt/usb1 /mnt/usb1 nfs4 defaults,rw,hard,rsize=1048576,wsize=1048576,timeo=300,retrans=2 0 0
10.0.10.31:/mnt/usb2 /mnt/usb2 nfs4 defaults,rw,hard,rsize=1048576,wsize=1048576,timeo=300,retrans=2 0 0
If the server with the local drive fails, I need to manually connect the drive to the second server and change the mount point from NFS to local. This manual intervention ensures that Frigate can continue to access the video recordings without interruption.
This setup provides a balance between flexibility and reliability, allowing me to handle server failures without requiring automated high availability for the external storage.
Backup
I migrated from VZDump to Proxmox Backup Server for several reasons. Firstly, Proxmox Backup Server offers deduplication, which significantly reduces the storage space required for backups. This is particularly beneficial in a homelab environment where storage efficiency is crucial. Additionally, Proxmox Backup Server provides faster backup and restore operations compared to VZDump, thanks to its optimized data handling and compression techniques.
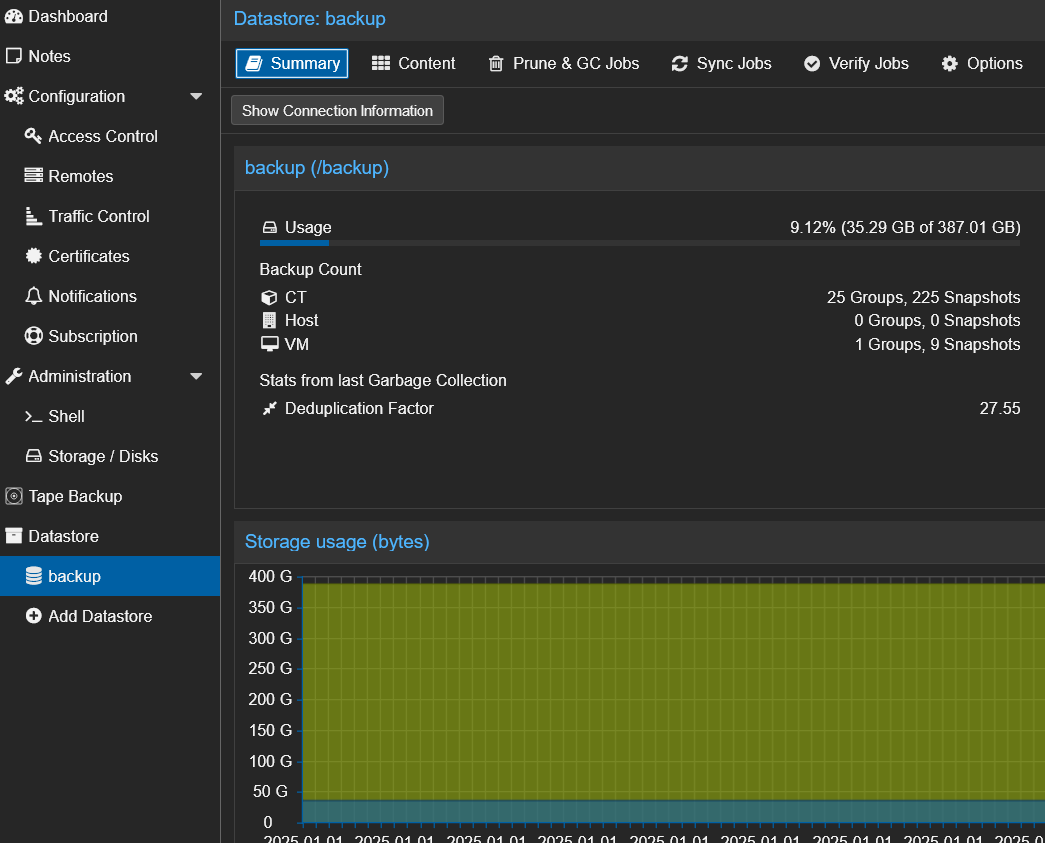
Proxmox Backup Server runs as an LXC container and utilizes a dedicated ZFS pool for storing backups. This pool is replicated to the second server using Proxmox’s replication feature, ensuring that backup data is always available and protected against hardware failures.
To avoid a chicken-and-egg problem, VZDump is configured to back up the Proxmox Backup Server itself. This ensures that even if the Backup Server encounters issues, I can still restore it from VZDump backups.

Power management
Besides serving as the QDevice for Proxmox quorum, the Dell Wyse 3040 plays another crucial role in my homelab. It monitors the UPS connected via USB and runs the Linux NUT (Network UPS Tools) server. This setup ensures that both Optiplex Micro servers, configured as NUT clients, can be gracefully shut down in case of a power failure, preventing data loss and hardware damage.
Zigbee coordinator
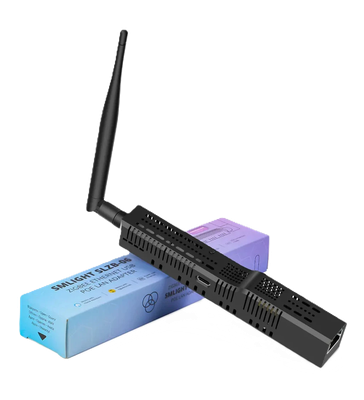
Initially, I used a Sonoff ZBDongle-E USB stick connected to my server. However, this setup wasn’t ideal for a clustered environment since only one server could access the USB device at a time. To overcome this limitation, I upgraded to an SLZB-06 Zigbee CC2652P coordinator. This device connects via Ethernet, allowing the Zigbee2Mqtt container to access it regardless of which server it’s running on. I strategically placed the coordinator in the center of my home to ensure optimal coverage for all Zigbee devices. The device is powered by PoE, simplifying installation, and features a built-in web interface for easy configuration and monitoring.
Summary
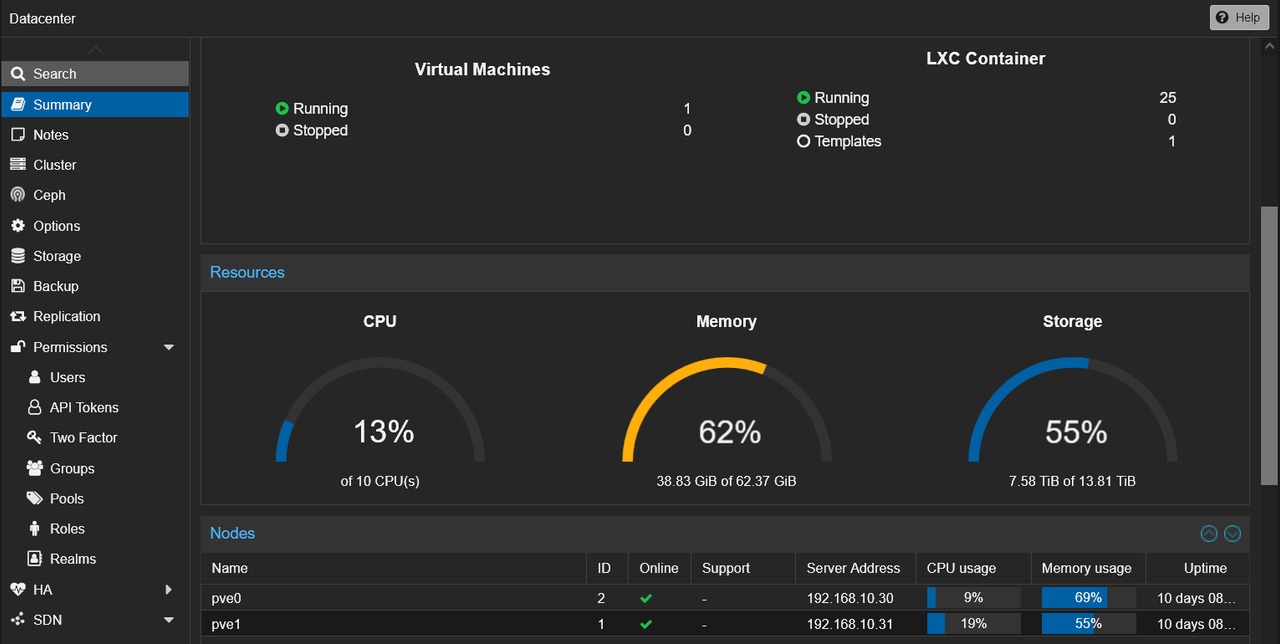
Upgrading my homelab has been an incredibly rewarding experience. Starting with a single server allowed me to grasp the fundamentals before scaling up to a highly available cluster. My current setup boasts 10 high-performance cores, 64GB of RAM, and 800GB of replicated storage on enterprise-grade SSDs. This configuration ensures that even if one server fails, the other can seamlessly take over with minimal or no downtime.
The total cost of this homelab upgrade was approximately 500 USD, which included the Dell Optiplex Micro 5070, Dell Wyse 3040, Intel DC S3610 1.6TB SSD, two RTL8125B network cards, and a new Zigbee coordinator. Despite the enhancements, the power consumption of my homelab only increased by 30W, from 100W to 130W, keeping it efficient and manageable.
Comments